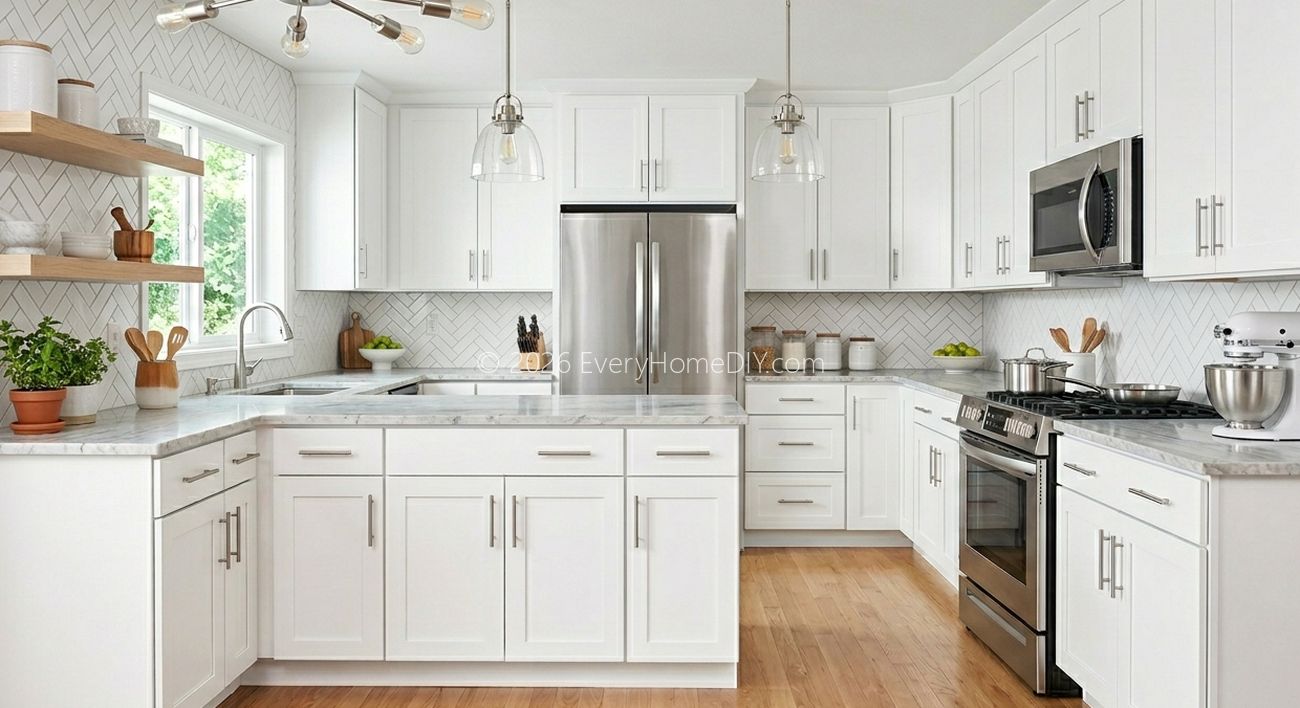
Why a Backsplash Is One of the Best Kitchen Upgrades
A kitchen backsplash serves two purposes: protecting your walls from moisture, grease, and food splatter, and making your kitchen look finished and designed. The area between your countertop and upper cabinets is the visual center of any kitchen — what you put there sets the entire tone of the space. Professional installation costs $400–$800 for a standard kitchen. A DIY installation costs $100–$200 in materials and a weekend of your time.
Best Backsplash Tile Options for DIYers
Peel-and-Stick Tile (Easiest)
Peel-and-stick vinyl or metal-finish tiles require no mortar, no grout, and can be installed in an afternoon. They're removable and renter-friendly. Downside: the look is less premium than real tile, and they can lift at edges over time in humid kitchens.
Mosaic Tile on Mesh Backing (Best DIY Option)
Mosaic tiles — whether ceramic, glass, stone, or subway tile — come pre-mounted on 12×12 mesh backing sheets. You set entire sheets at once rather than individual tiles, which dramatically speeds up installation. The 12×12 format simplifies layout and reduces cuts. This is the most popular DIY backsplash method.
Individual Large-Format Tile (Most Professional Look)
4×12 subway tiles, 3×6 classics, or larger format porcelain tiles give the most polished result but require more precise installation and cutting. Still very manageable for an experienced DIYer.
Step 1: Prepare the Surface
Turn off the GFCI outlets before starting. Remove outlet and switch covers. Clean the wall thoroughly — kitchen walls accumulate grease that prevents adhesive from bonding. Use TSP or a strong degreaser, let dry completely.
Step 2: Plan Your Layout
Find the center of your backsplash area (usually above the range) and work outward. Center the pattern on the most visible focal point — usually directly above the stove. Dry-lay tiles on the counter to preview the layout and identify where cuts will fall.
Step 3: Apply Mastic Adhesive
For backsplash tile, use white mastic tile adhesive (not thin-set mortar) — it's easier to work with in vertical applications, doesn't sag, and bonds well to painted drywall. Apply with a V-notch trowel, working in 2–3 square foot sections so the adhesive doesn't dry before you set the tile.
Step 4: Set the Tile
Press each sheet firmly into the adhesive, using a grout float to ensure full contact. Use tile spacers (1/16 inch for mosaic, 1/8 inch for larger format) between sheets. Check alignment frequently — once mastic grabs, repositioning is difficult.
Step 5: Cut Border Tiles
A tile wet saw handles all straight cuts cleanly. For individual tiles in a mosaic sheet, score-and-snap with tile nippers. Mark cuts with a pencil, not pen — pen marks can bleed through grout.
Step 6: Grout and Seal
Wait 24 hours for adhesive to cure. Apply unsanded grout (for joints under 1/8 inch) with a rubber grout float diagonally across the tiles. Wipe excess with a damp sponge after 15 minutes. Buff away haze with a dry cloth after 24 hours. Apply grout sealer after 72 hours to protect against staining.